Thought I’d better try writing this up as it took me bloody ages to get my head round it.
Situation: you have an object that you want lots of instances of, all with different looks. Say, one tree object, but you want lots of instances with variations in their colouring.
The approach differs depending on whether your tree object is in the scene file somewhere (ie instanced using s@instance=”/obj/my_tree”) or if it’s a file on disk (s@instancefile=”$HIP/geo_trees/my_tree.rs”).
Instancing a scene object
You can use either point attributes or stylesheets to poke new values into the material parameters: see https://docs.redshift3d.com/pages/viewpage.action?pageId=12419786&product=houdini for guidance.
Instancing a proxy file from disk
This is slightly more tricky: you must use stylesheets, and you can only poke new values into parameters that are exposed at the material’s top level VOP node. I’ve created a hip file to illustrate:
Download: RS per-instance colours_001.hiplc
To test it, just make sure you “render” the Proxy ROP first, to create an .rs proxy file for the scene to use. It’ll create an RS proxy containing this single plane with some nasty coouring:
Then you can go to Render view and render an image.
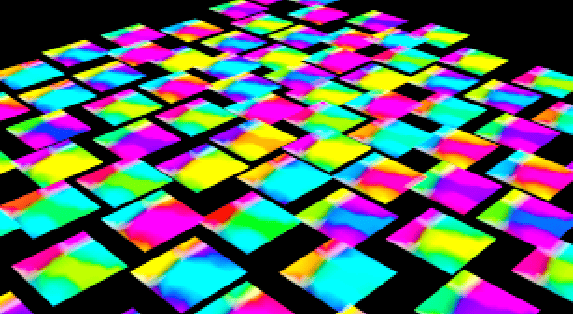
You should see this lurid mess:
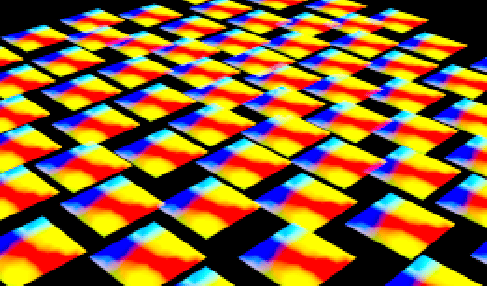
But that means everything is working. Every plane has a different hue shift going on, even though they’re all identical instances. If it wasn’t working, you’d see this:
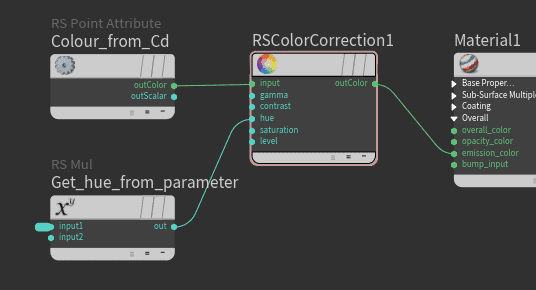
This is how it works: to vary the material, I’ve stuck an RS Color Correct node in the material, and an RS Multiply node to multiply an incoming 0-1.0 value by 360 (turns out the hue shift parameter on a colour correct node wants a value in degrees, which caught me out for a while):

and exposed the Hue Shift parameter—promoted it to the top level VOP—so it now appears as a parameter on the material itself:
That parameter name is important—hue, in this case—as that’s the thing we can bind and alter on an instance-by-instance basis using a stylesheet override.
So—into the stylesheets: to get to them, open a Data Tree pane, and choose “Material Style Sheets” from the dropdown. I’ve added a Style Sheet Parameter, and a Style, a target (“Point Instances”) and two overrides:
The first override sets the material to the one that’s in the scene (as opposed to any that may be saved in the proxy file itself). You can only override materials present in your scene, not ones within the proxy (as far as I can tell).
The second override is an “Override Script” – even though it’s not really a script: you can choose “Material Parameter” and “Attribute Binding” from the dropdowns. The Override Name is the parameter that’s exposed on the material—”hue”—and the Override Value is the point attribute you want to bind it to. In this case, my Instance object has a bunch of points to instance to, each with an @hue_shift attribute.
And that’s it. No reason to only use this for shifting hues: you could create a material with a shader switch, or a texture, and as long as you expose the switch parameter or the texture filename string in the top VOP level of the material, you can poke new values in at render time like this.
One caveat/limitation: Redshift is blazingly fast at rendering loads of instances. But if you try tweaking 1000s of instance’s materials like this, you may find that the pre-render processing, as Redshift builds the scene, could become quite time-consuming. I’m guessing that behind the scenes Redshift is creating a new shader for each tweaked material. So for huge scenes with loads of instances, you may need to take a different approach to adding variety. Stay tuned.


