Man, I hate drilling holes in PCBs. I make my boards with a mill, so it shouldn’t be too hard to swap the V-cutting bit for a drill bit, but I Just. Can’t. Be. Arsed.
And besides, I like making things as small and slimline and dinky as possible.
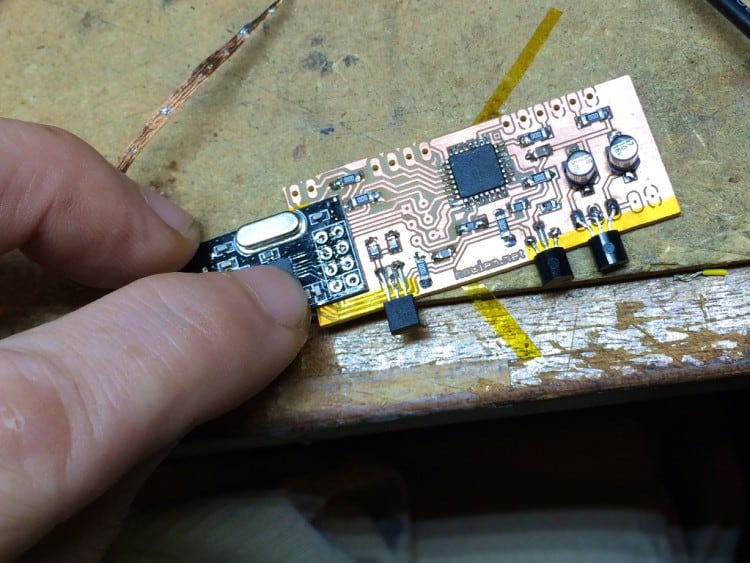
The little PCB above is a backpack for an LCD. Couldn’t avoid having to drill holes along the top to connect to the LCD itself, but everything else can be surface mounted.
But sometimes you need a way to connect, say, an nRF transceiver, or one of those newfangled ESP8266 WIFI module to your PCB, and they come already fitted with a pin header. And that would mean drilling more holes, and having the module standing off the board slightly. Yuck.
So here’s my hacky approach. First, design your PCB so the pads are on the top of your board, rather than the bottom: we’re going to take advantage of the fact the little transceivers are always double-sided boards, with through-hole plated holes.
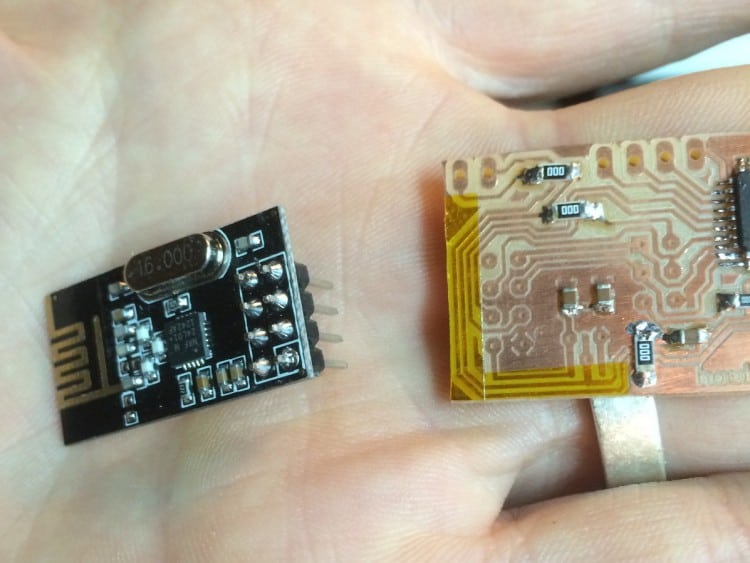
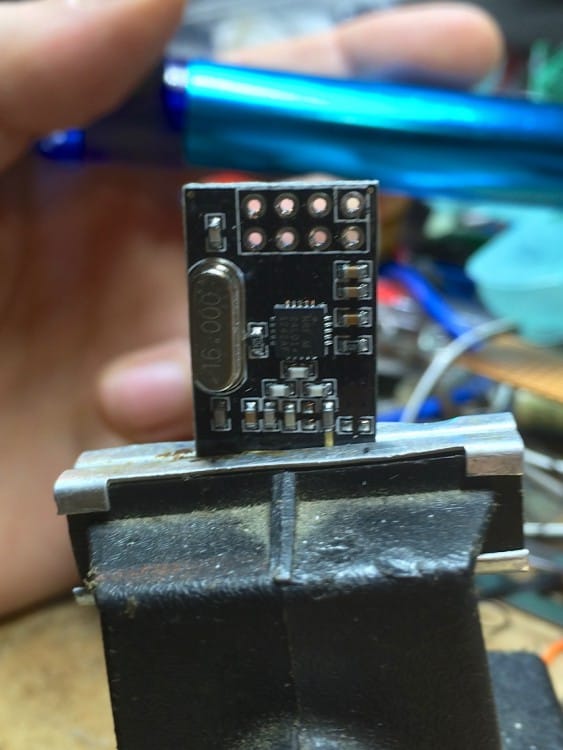
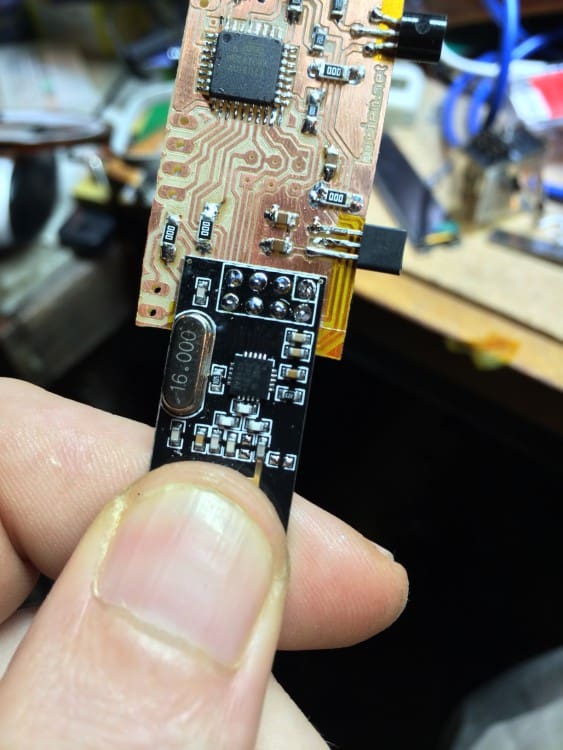
Transceiver on the left, my board with its 8 pads on the right:
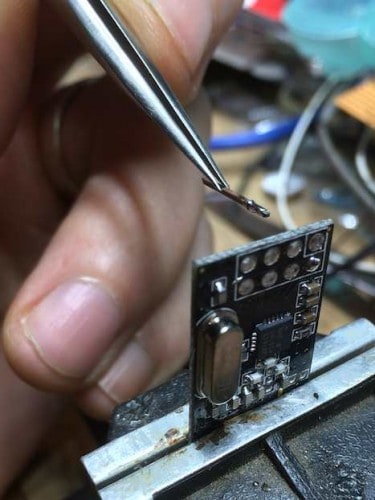
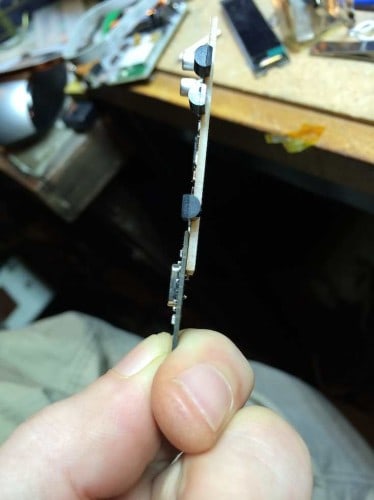
First step, get that header off the transceiver. With a blade, you can carefully lever off the plastic spacer tying the header pins together – do it gently, a little at a time, working from both ends of the header.
Then you can remove the pins one at a time nice and easily. Last one:
Next step – with the board held vertically, soldering iron on one side and solder sucker on the other, you can clean out all the solder from the holes:

Important – when you’ve removed the pins, you need to make sure the now-empty pads on the bottom of the board are tinned with solder; as the header was originally soldered on the other side of the board, they may not be. So give ’em a blob of solder.
Then remove as much solder as you can from the holes. You need it to be as tidy as possible, every through-hole tinned, but as clean as possible:
Next step: on your PCB, tin all the pads with the thinnest layer of solder you can. Then put a slightly larger blob of solder on diagonally opposite pads. Try and make them nicely rounded blobs, as they’ll act like locating pins:

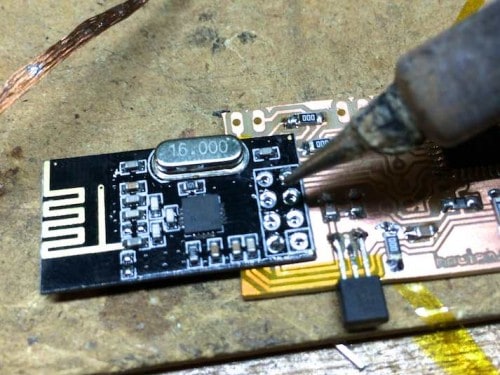
Which means when you press the transceiver board down in position over the pads, it’ll locate itself perfectly squarely, with all the pads (hopefully) lining up perfectly between the two boards:
Touch your soldering iron to the two corner pads to melt the blobs and fix your boards together:
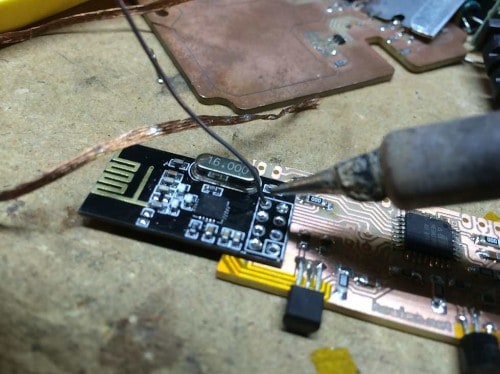
You should be able to look through the remaining holes to see whether they’re lining up perfectly with the pads underneath, then just fill the remaining holes with solder so they connect all the way through.
It’s a balancing act – you want enough solder to fill the hole and join up with the tinned pad on the board underneath, but you don’t want so much solder that it creates shorts inbetween the two boards.
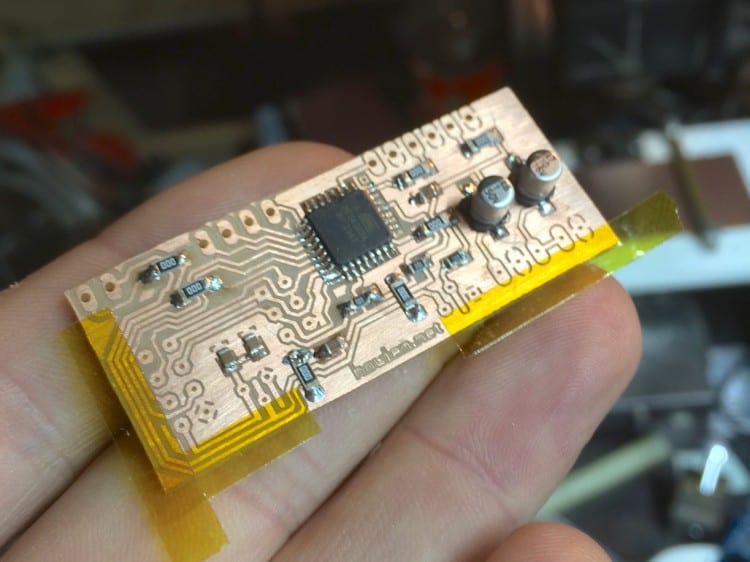
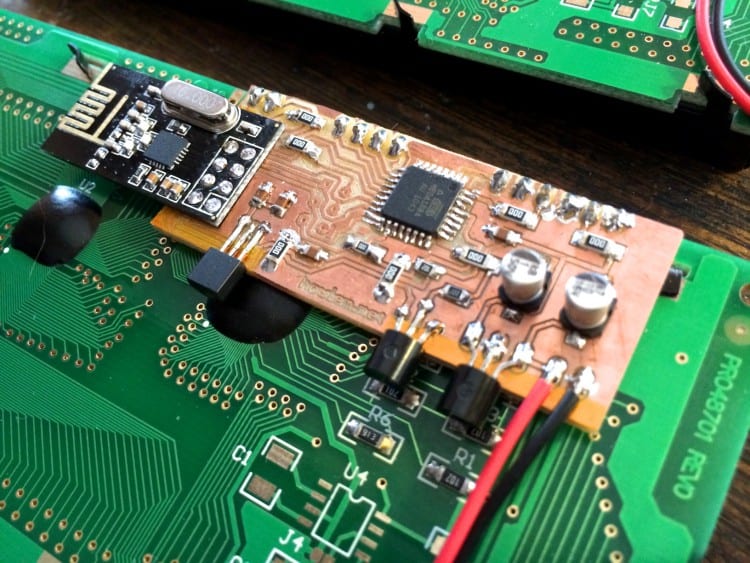
Result: two boards stuck together, without the extra height the header would create:
Check the connections with a multimeter before powering it up, just to make sure there are no shorts. If there are (which has only happened once out of the few dozen times I’ve done this), you can separate the boards by melting the solder, pad by pad, working a bit of folded-over kapton tape between them to keep them from reconnecting as they cool. Then clean up the two boards and have another go.
It may seem like a complicated way to avoid drilling eight little holes, but once you’ve done it a few times it’s surprisingly quick and easy and it knocks quite a few millimetres off the height of the board.
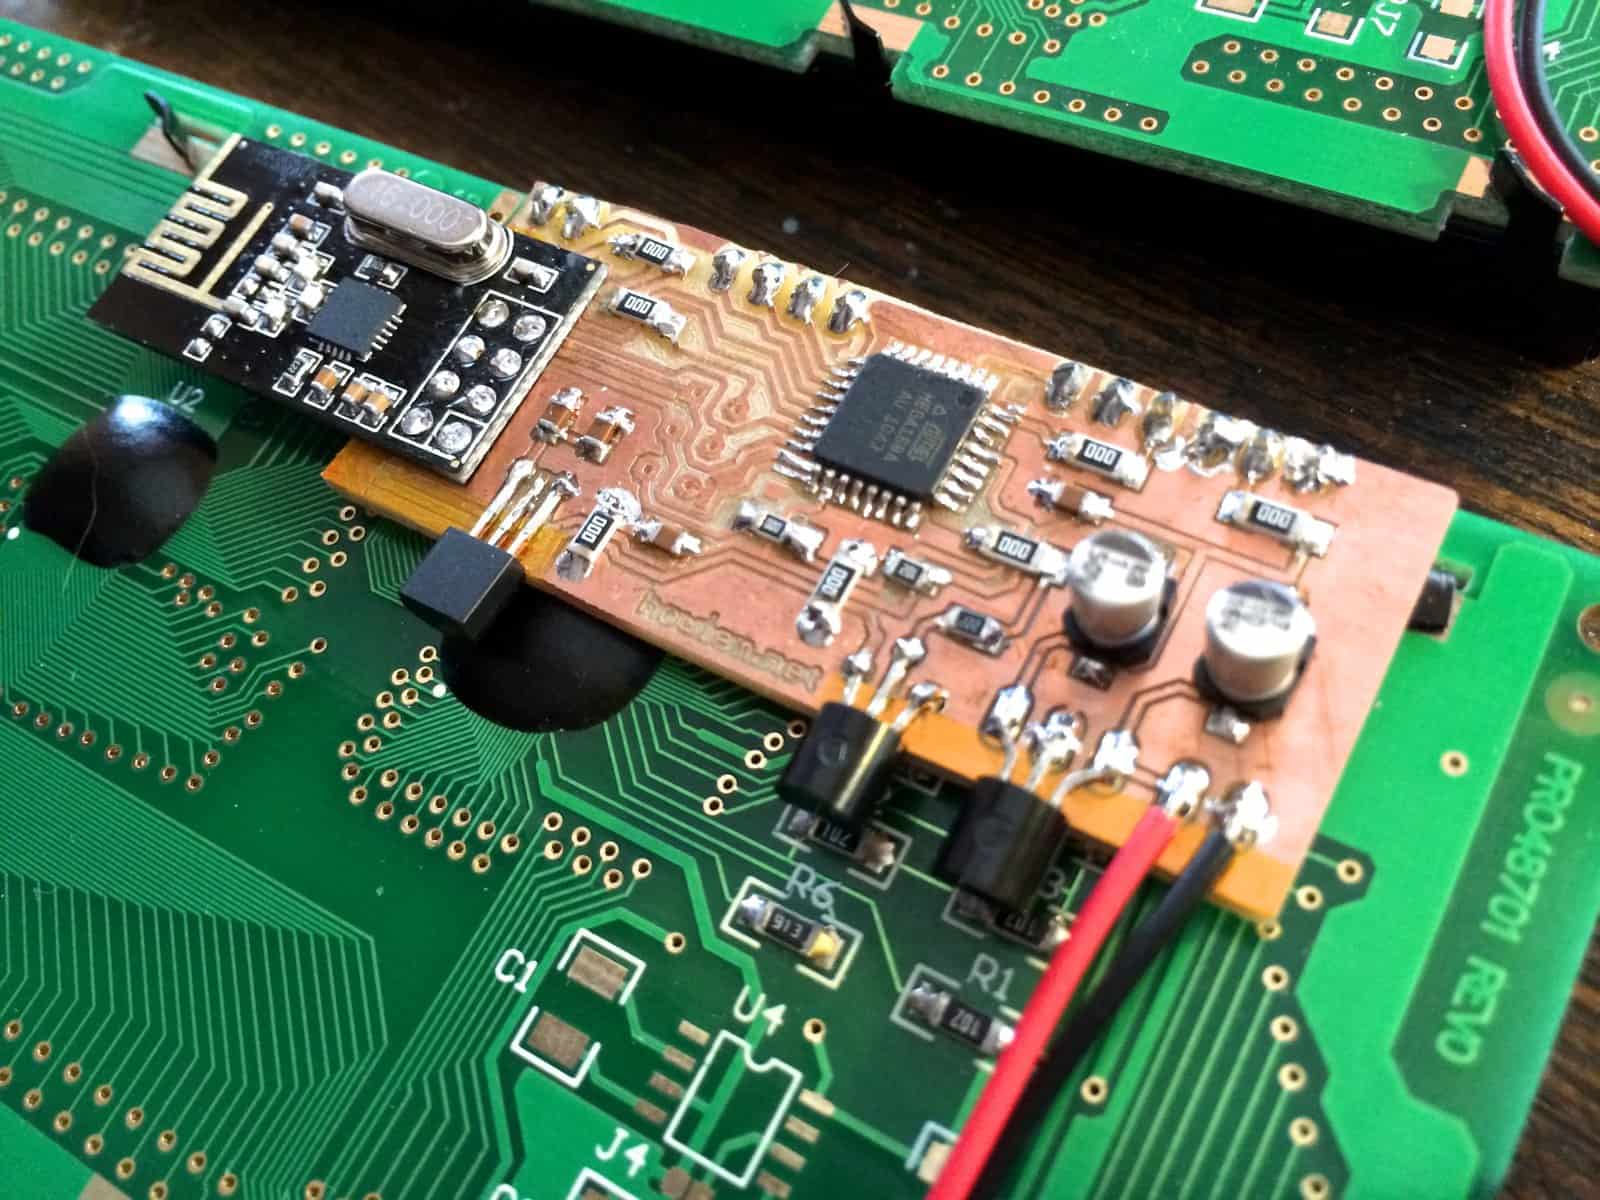
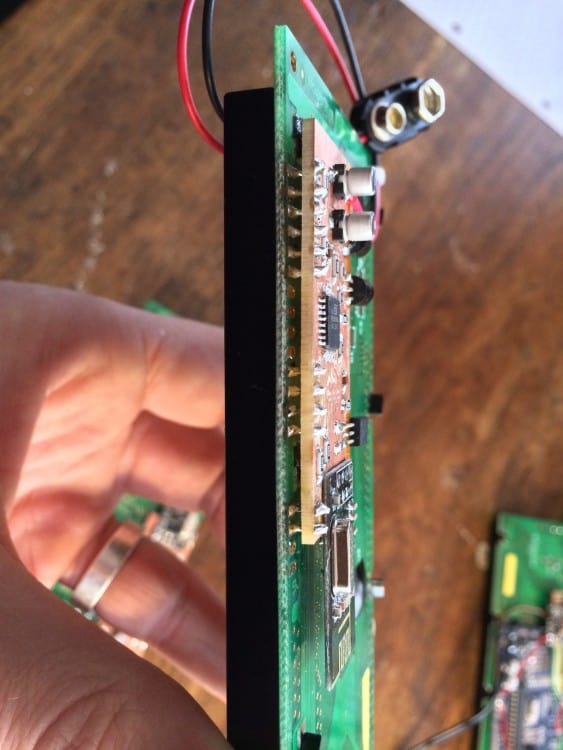
Finished PCB in position (note to future self: gotta find a way of moving those electrolytic caps off to the side of the board next time):
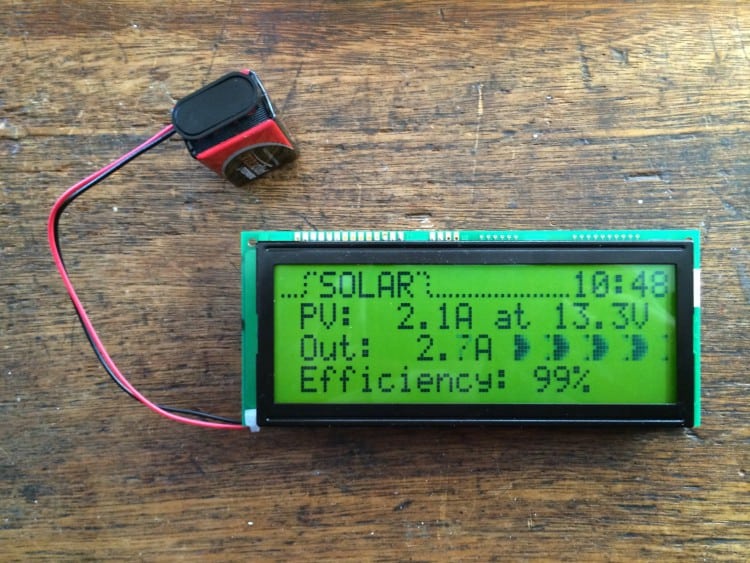
Final result: a wireless LCD readout for my solar panels:
Note: this is a hacky and, arguably, utterly unnecessary technique, but I like it, so there 🙂
The blog is very informative and these tips are very helpful. Thanks